What games have captivated your heart? Whether it’s the compelling stories, the endless fun, or other elements that define a game’s appeal, one critical aspect often stands out: graphics.
Games with attractive graphics grab people’s attention and fully immerse gamers into their worlds. As a result, high-definition graphic games are increasingly being developed to entice and entertain players more effectively.
To capture players with high-definition graphics, developers turn to a vital tool: the game engine.
Did you know that 70% of mobile games and 50% of PC games have been developed using this engine? It’s none other than Unity.
From 2D to 3D, Unity offers a wide range of functionalities, including cloud services and artificial intelligence, to achieve high-quality graphics. What exactly is the game engine Unity, and how does it enhance visual effects through “Post-Processing“?
Let Elancer, South Korea’s No.1 talent matching platform, provide you with detailed insights!
What is Unity?

Unity is a leading game engine tool that provides various functionalities for game development, from 2D to 3D, facilitating a convenient development environment.
With 70% of mobile games and 50% of PC games developed using Unity, it holds significant influence in the game development sector.
Unity enables the development of everything from 3D games to animations, virtual reality (VR), and augmented reality (AR) projects.
Thanks to cloud services, it offers continuously updated services, and the Unity community among developers is vibrant, making the implementation of 2D to 3D graphics diverse and straightforward.
As technology advances, the demand for realistic and lavish 3D graphics in games grows, with many companies leading in implementing 3D graphics using Unity. We’ll share tips on using Unity’s “Post-Processing” to enhance your 3D graphics quality, saving time and improving visuals effectively.
What is Post-Processing?
Post-processing, in essence, means the graphical post-work in Unity. It provides features that allow the application of specific filters or effects to cameras, improving the project’s graphic quality. These functionalities enable the instant implementation of visual effects and easy improvement of scene quality.
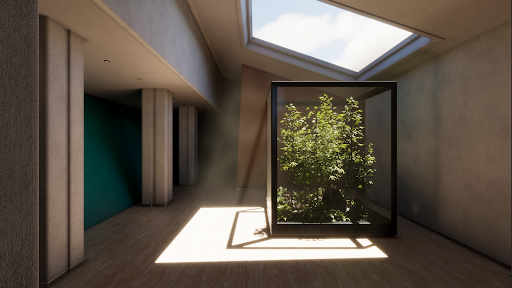
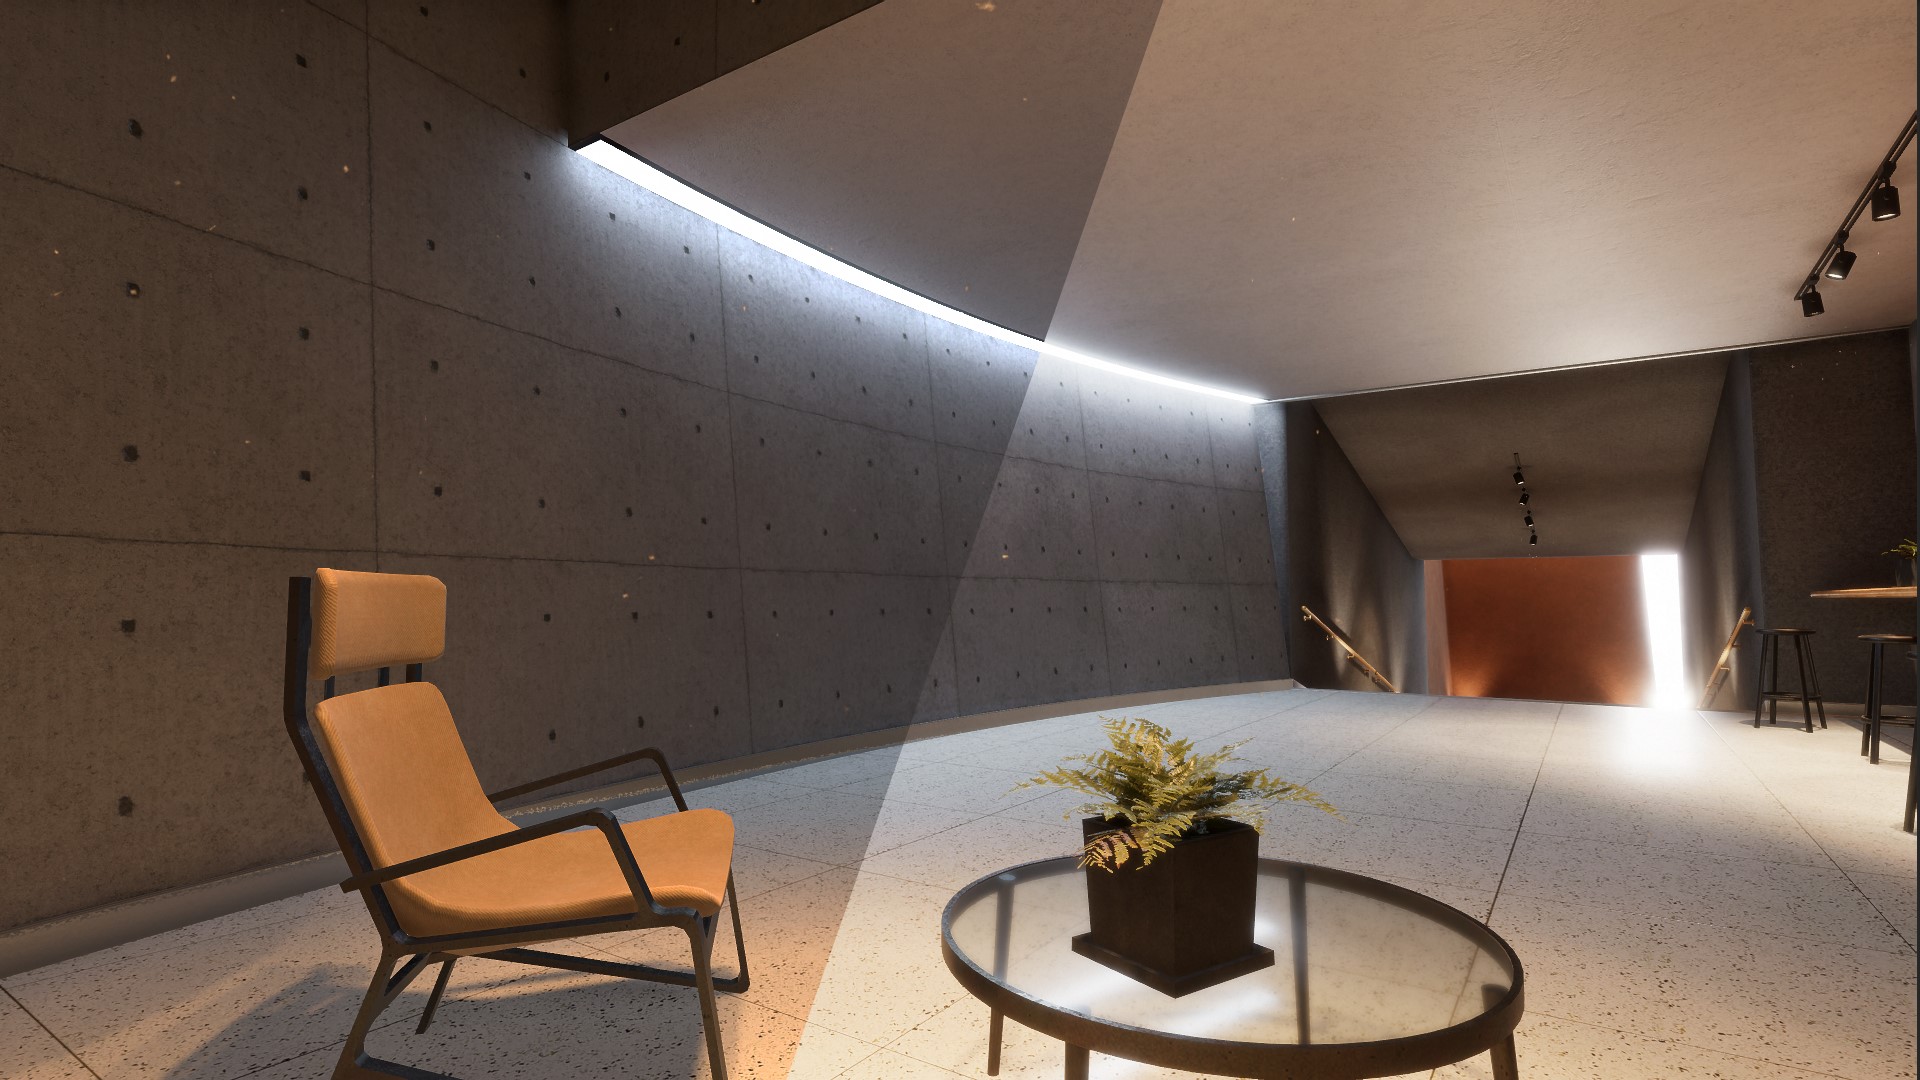
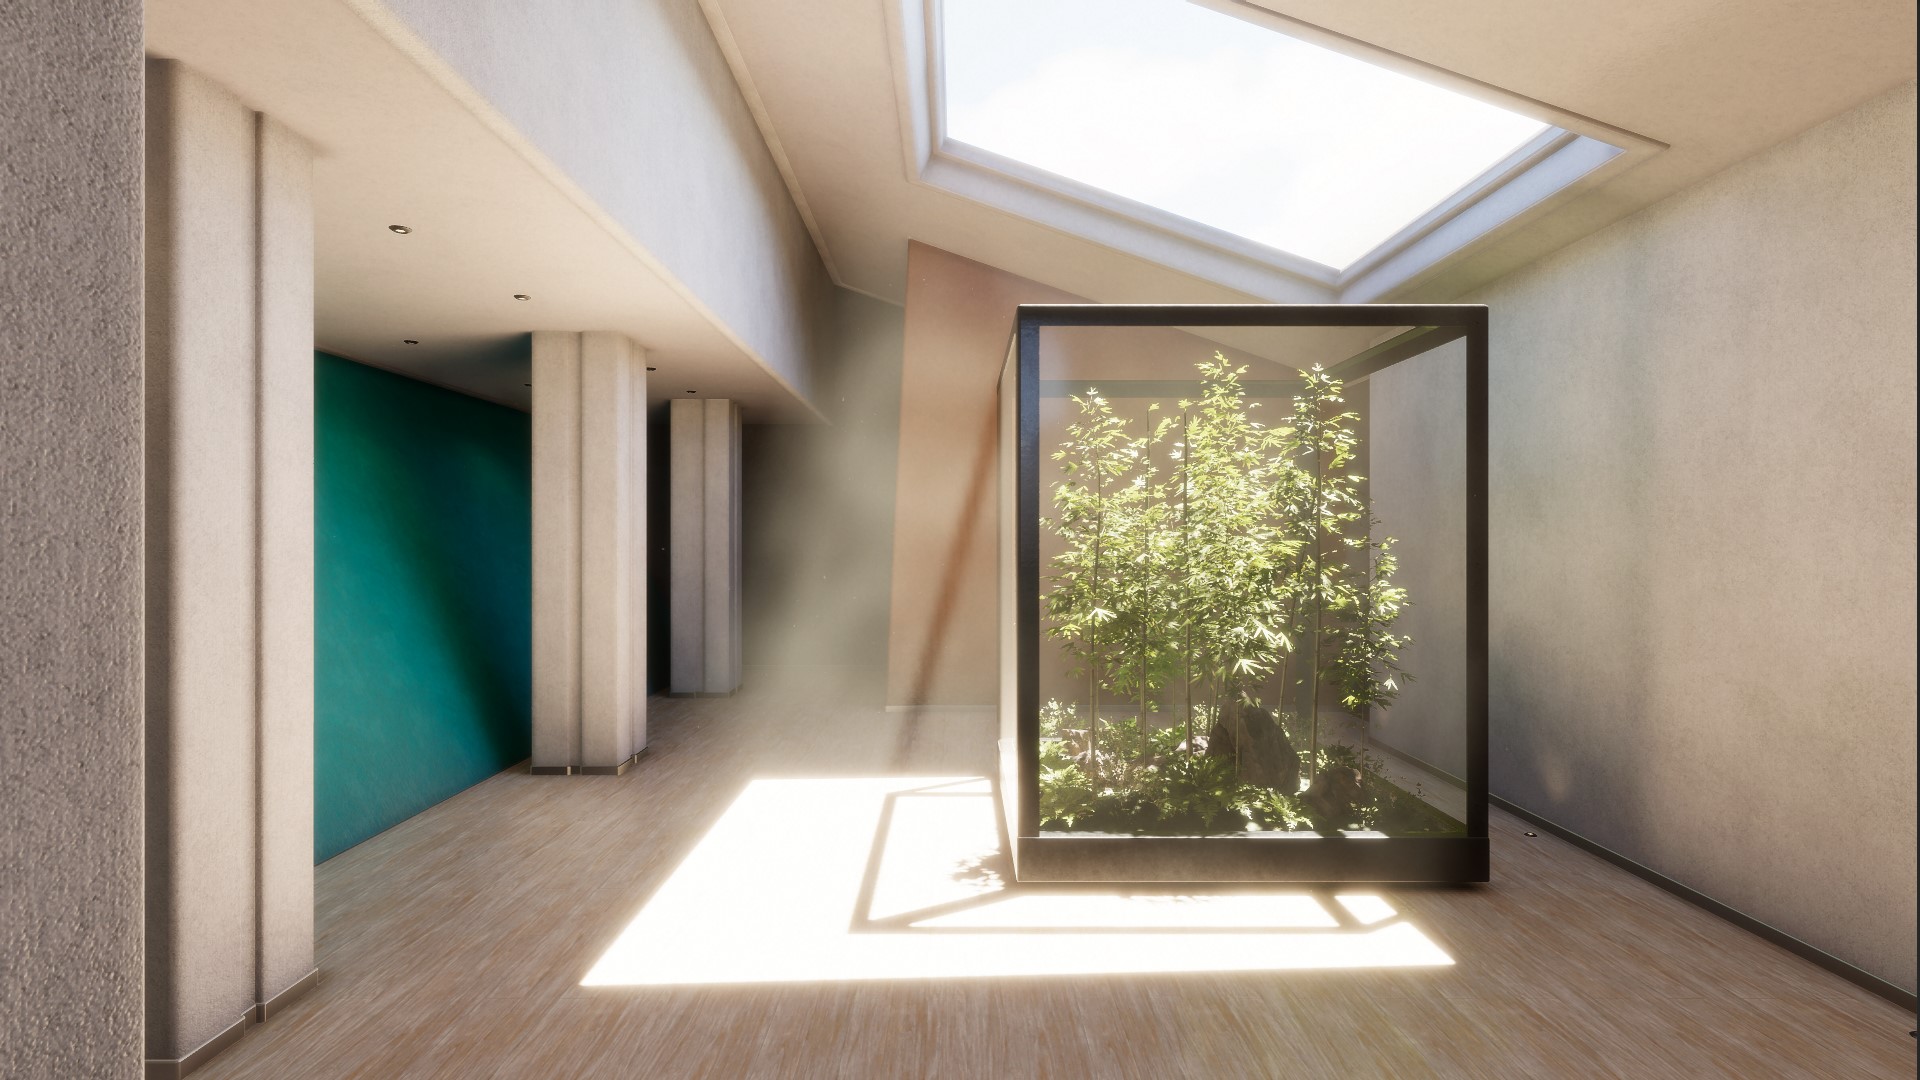
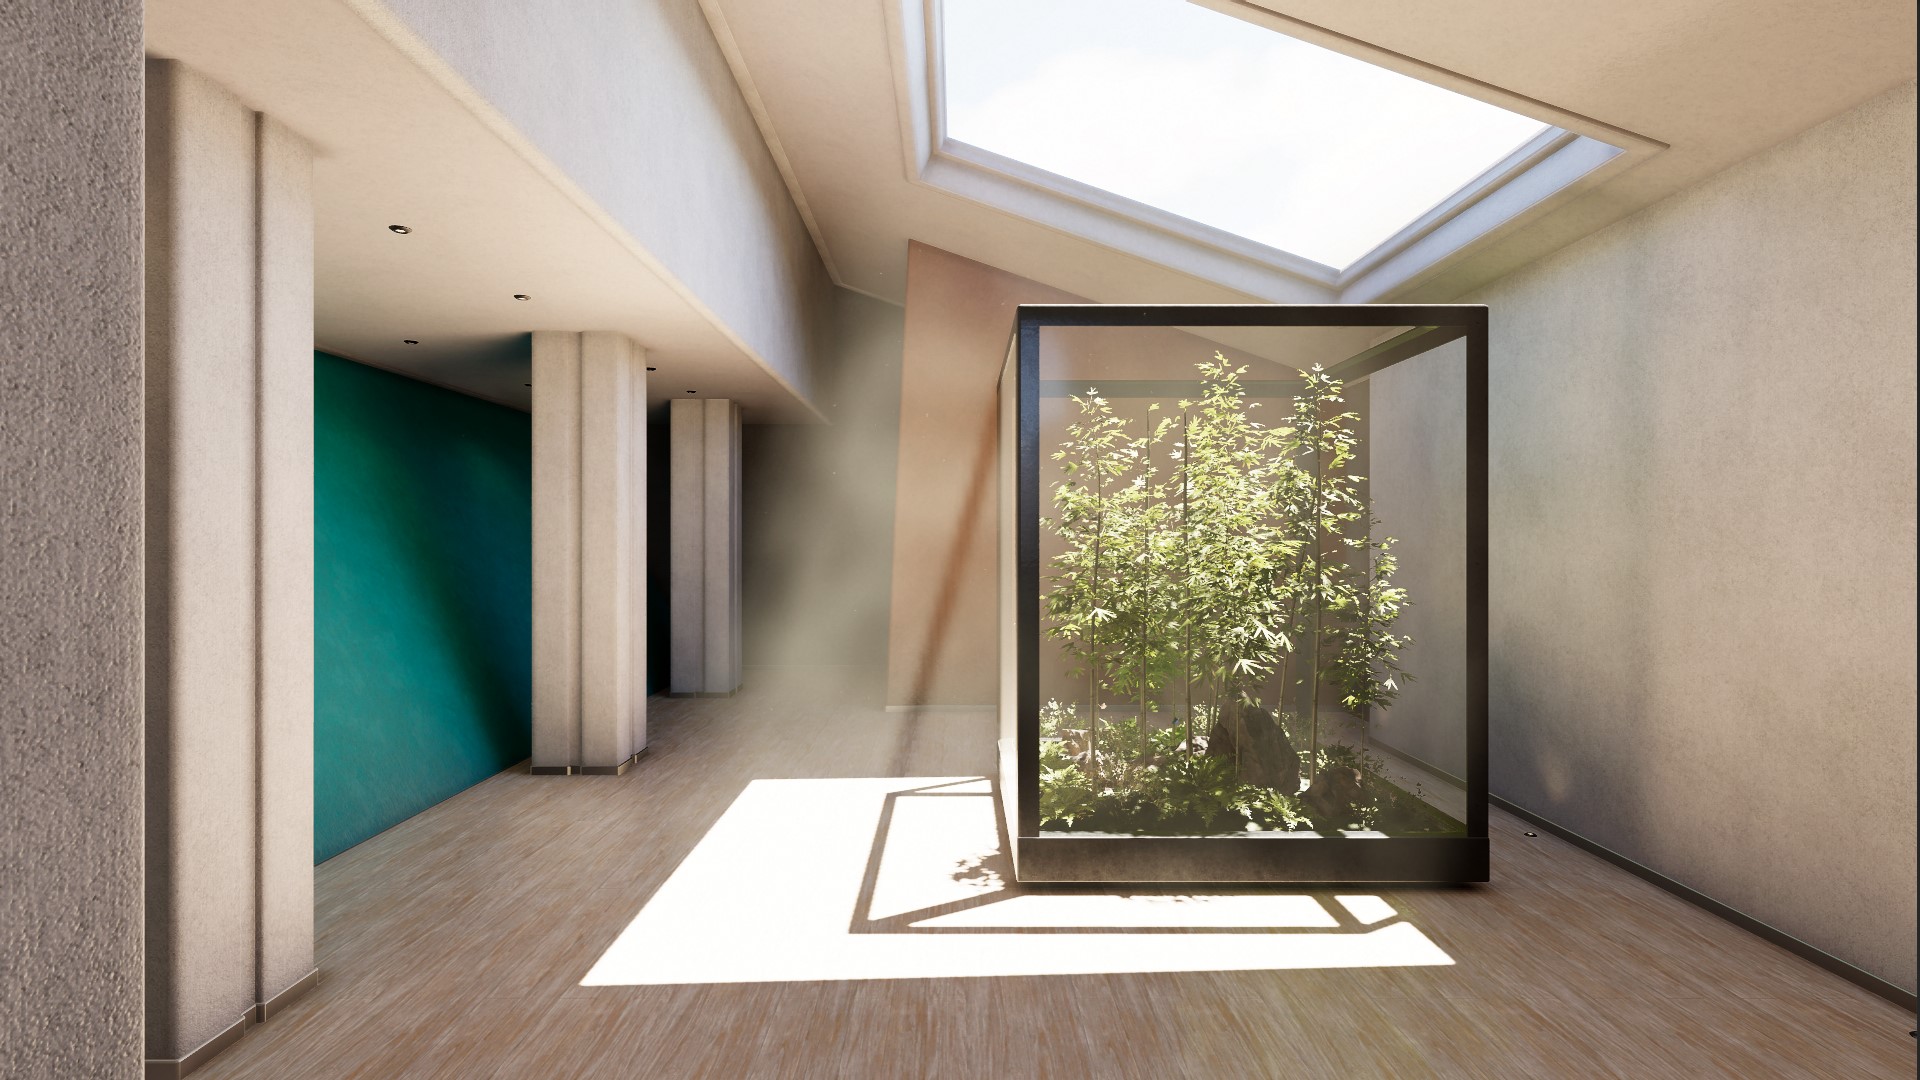
Before and After using Post-Processing
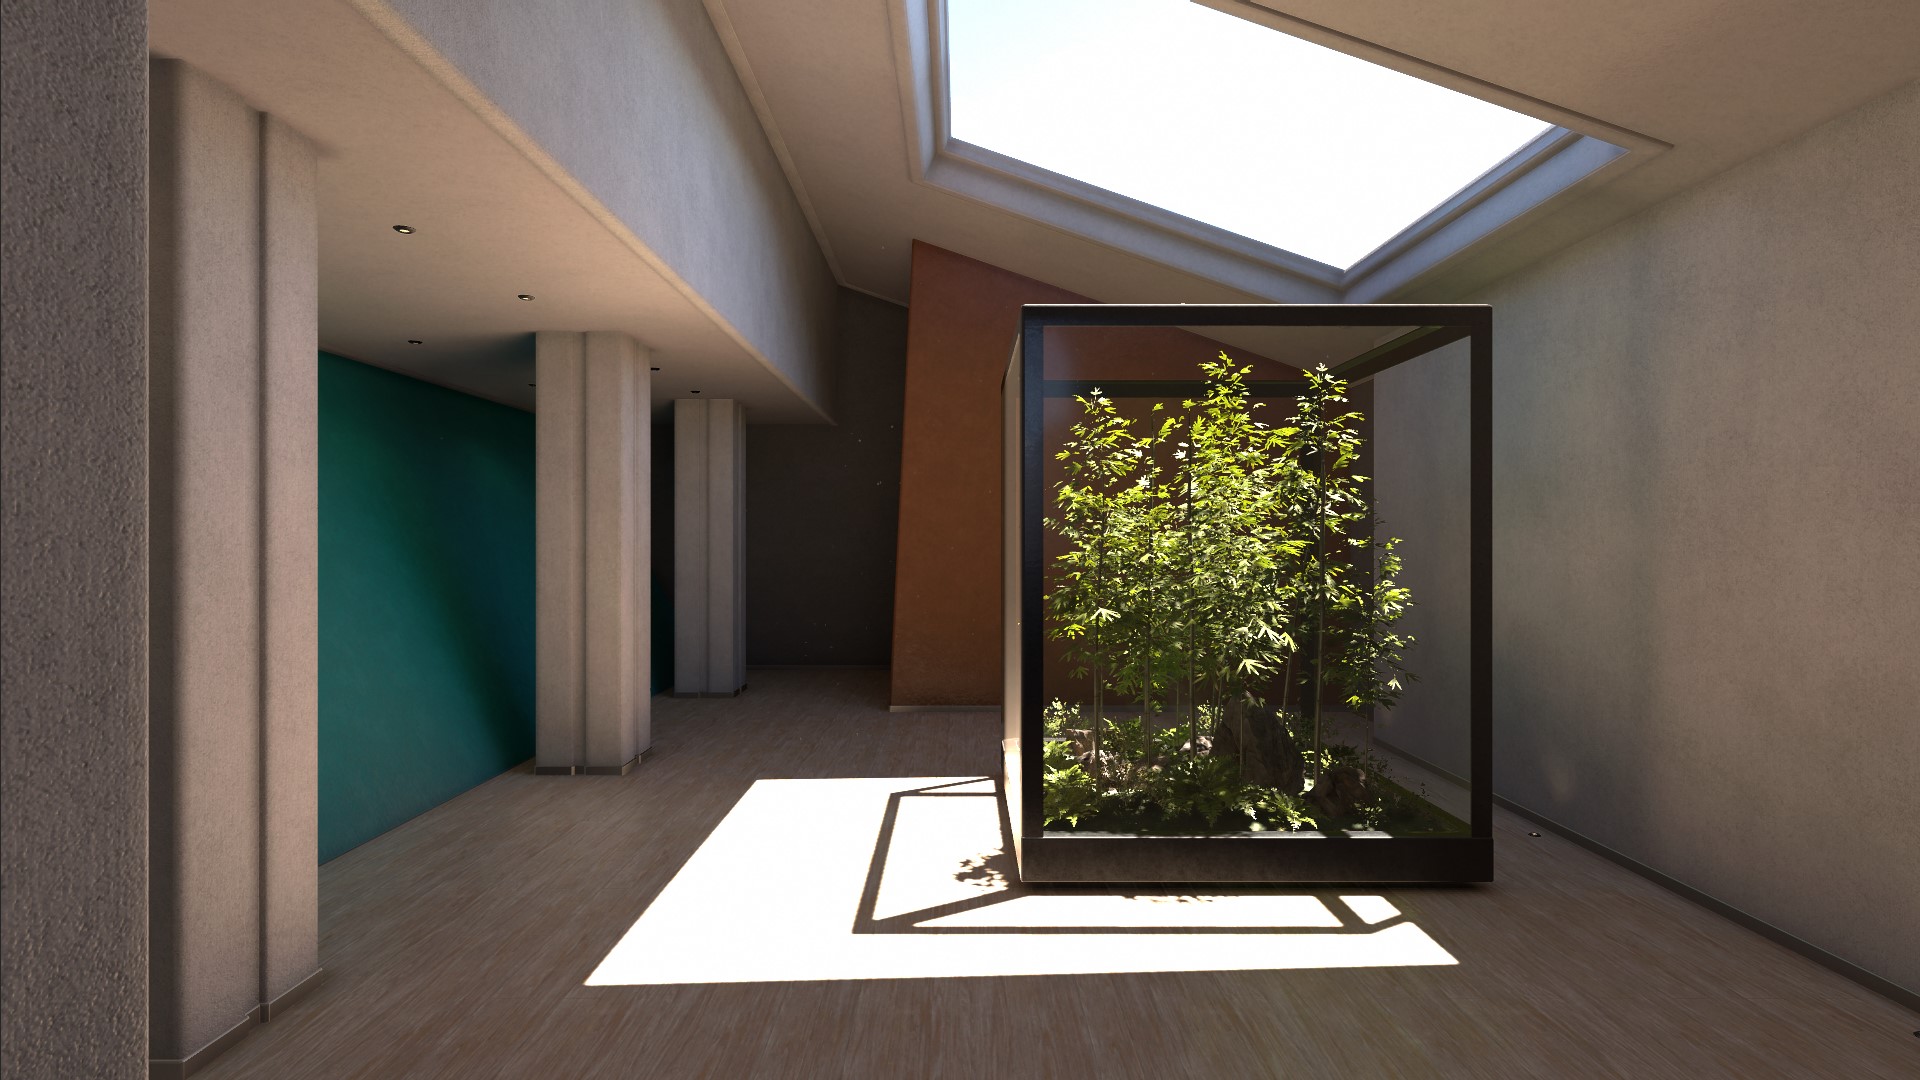
Before

After
Comparing images before and after applying graphic post-processing in games, you can see how it can change the atmosphere of scenes, conveying the developer’s intent. Realistic graphics obtained through Post-Processing help users immerse themselves more into the game.
Understanding Post-Processing features means you can easily create the desired environment without complex shader or graphics study.
This article will cover how to apply Post-Processing, the three commonly used Post-Processing effects, and what to watch out for when using these features.
How to Apply Post-Processing?
Applying Post-Processing in Unity is simple with the package provided by Unity. Following the steps we describe, you can easily apply it in less than five minutes.
Opening the Package Manager
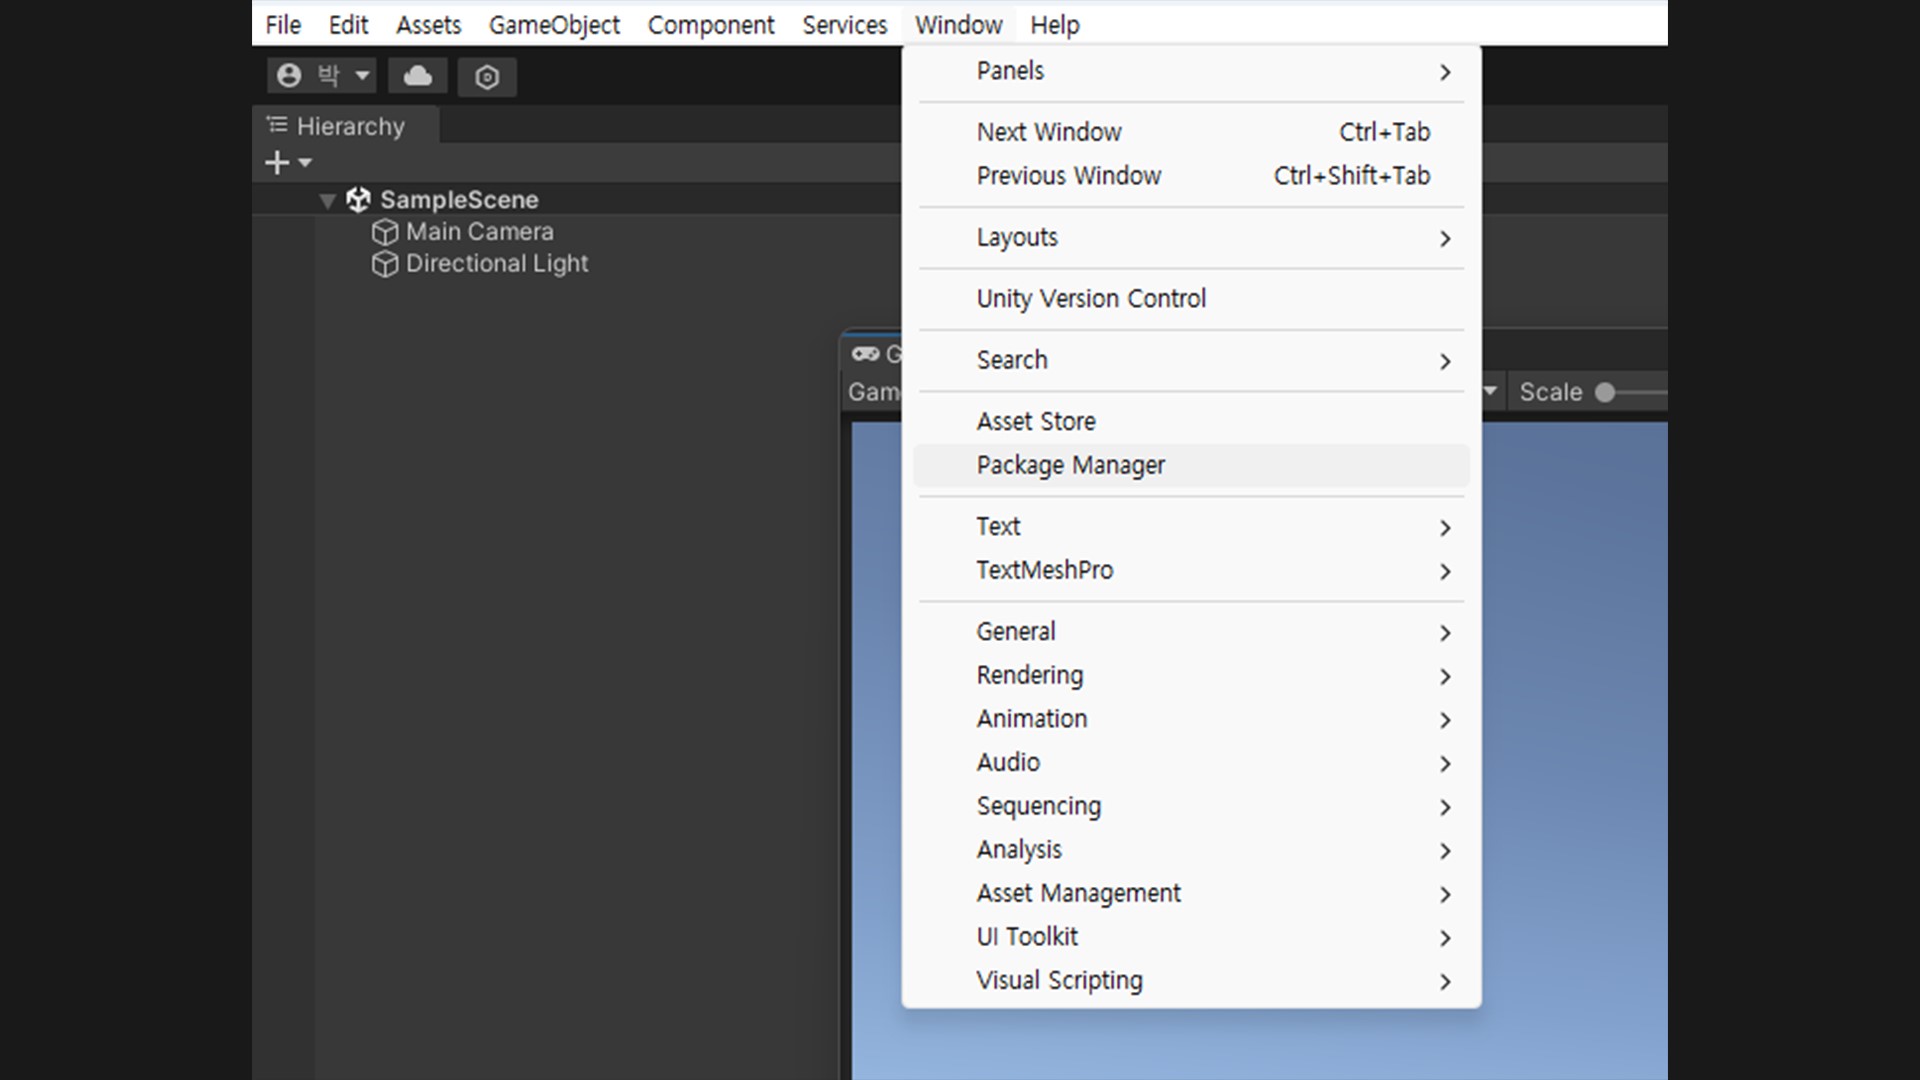
Click on the Window in the Unity top bar, then select Package Manager.
Installing Post Processing
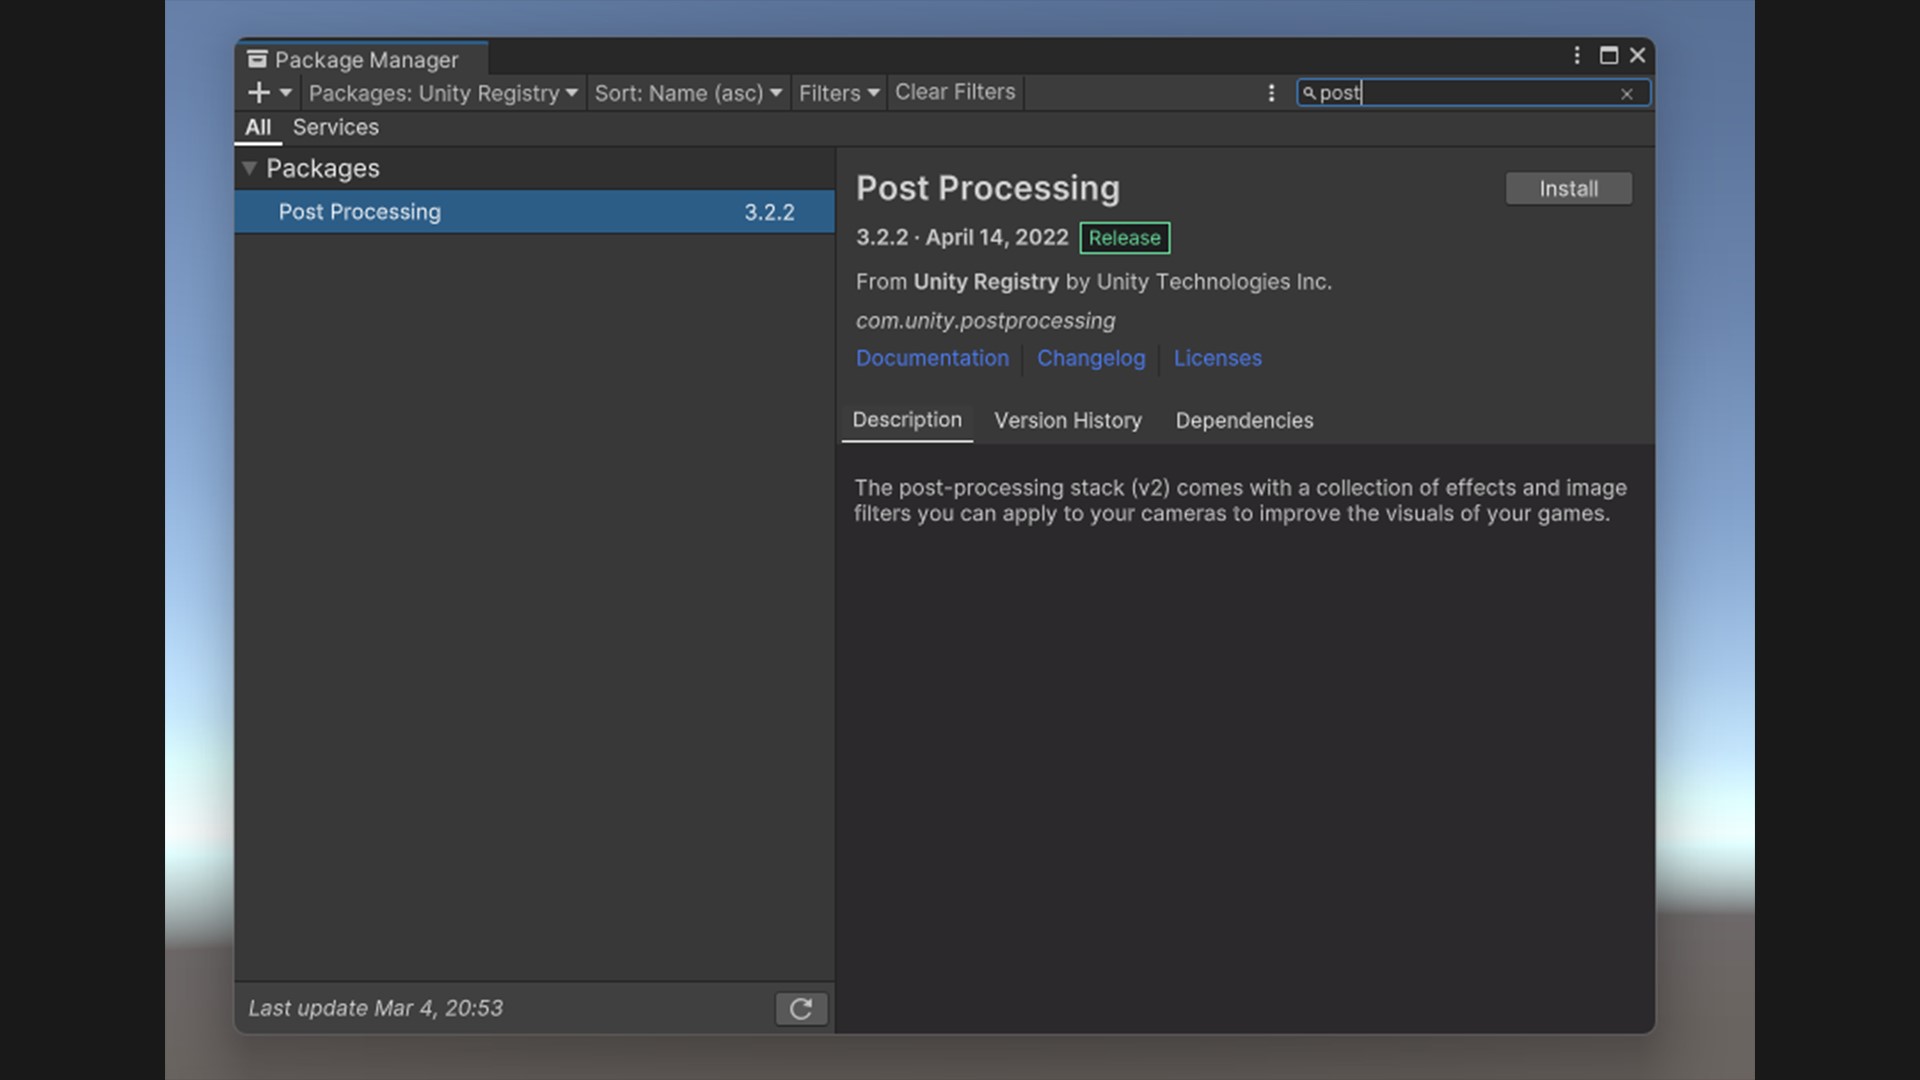
Click on the Packages tab, select Unity Registry, search for Post Processing, and then click the Install button.
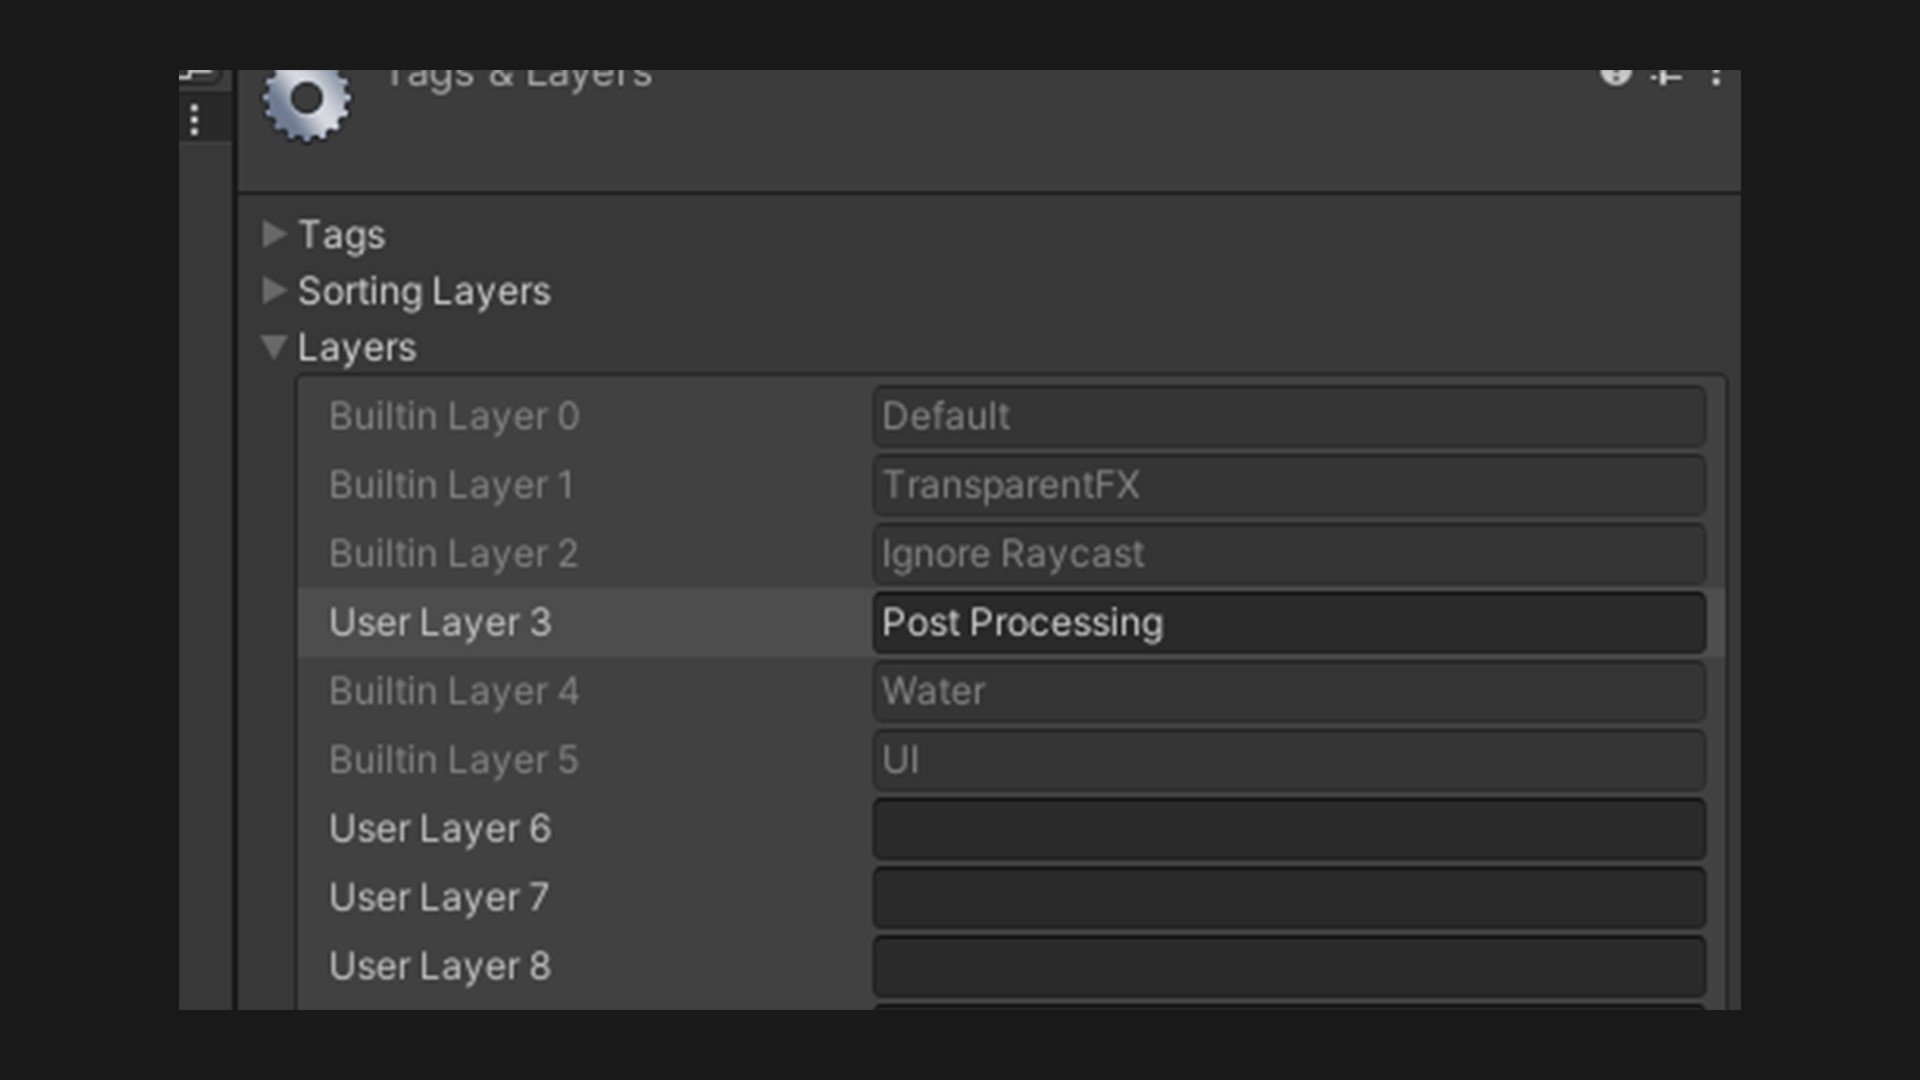
Adding a Layer
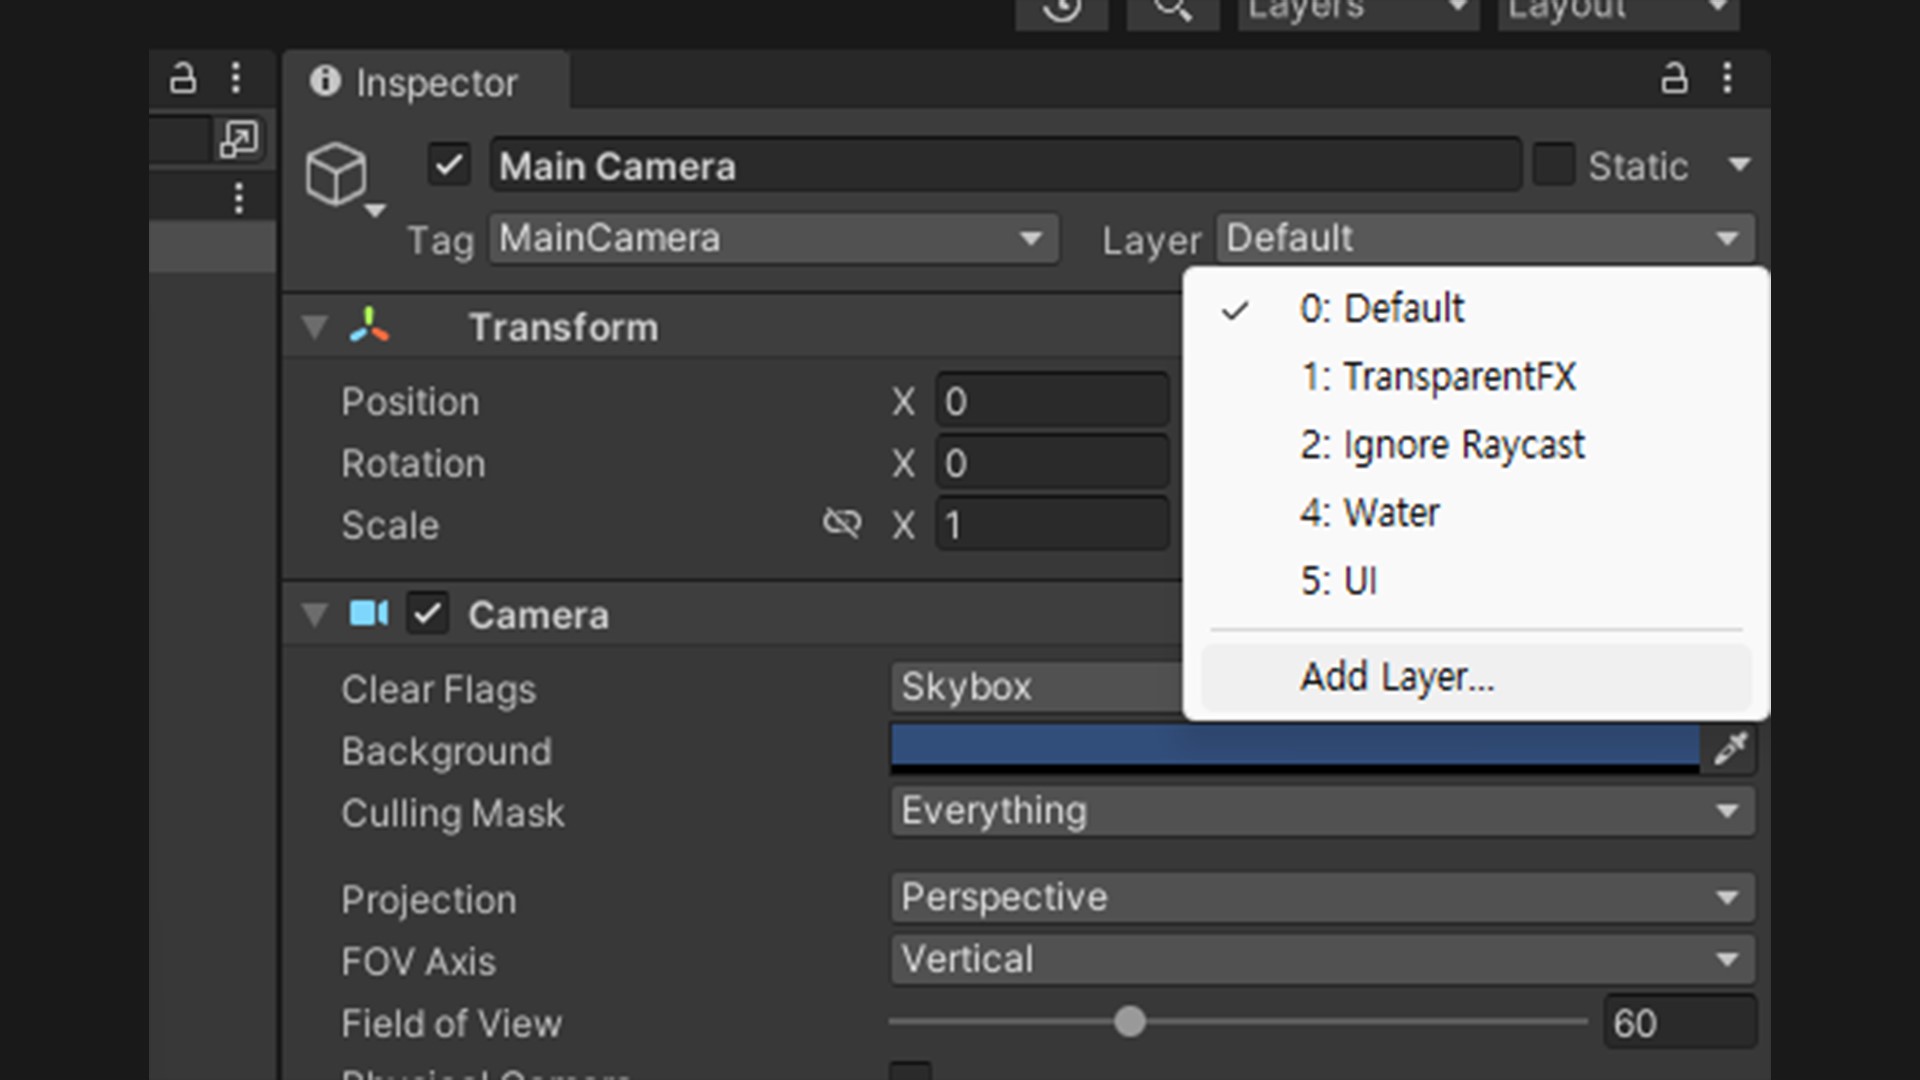
Click on the Layer button at the top right of the Inspector to add a new layer.
Regardless of the layer number or name, simply adding a new layer will do.
Adding Post-process Layer to Main Camera
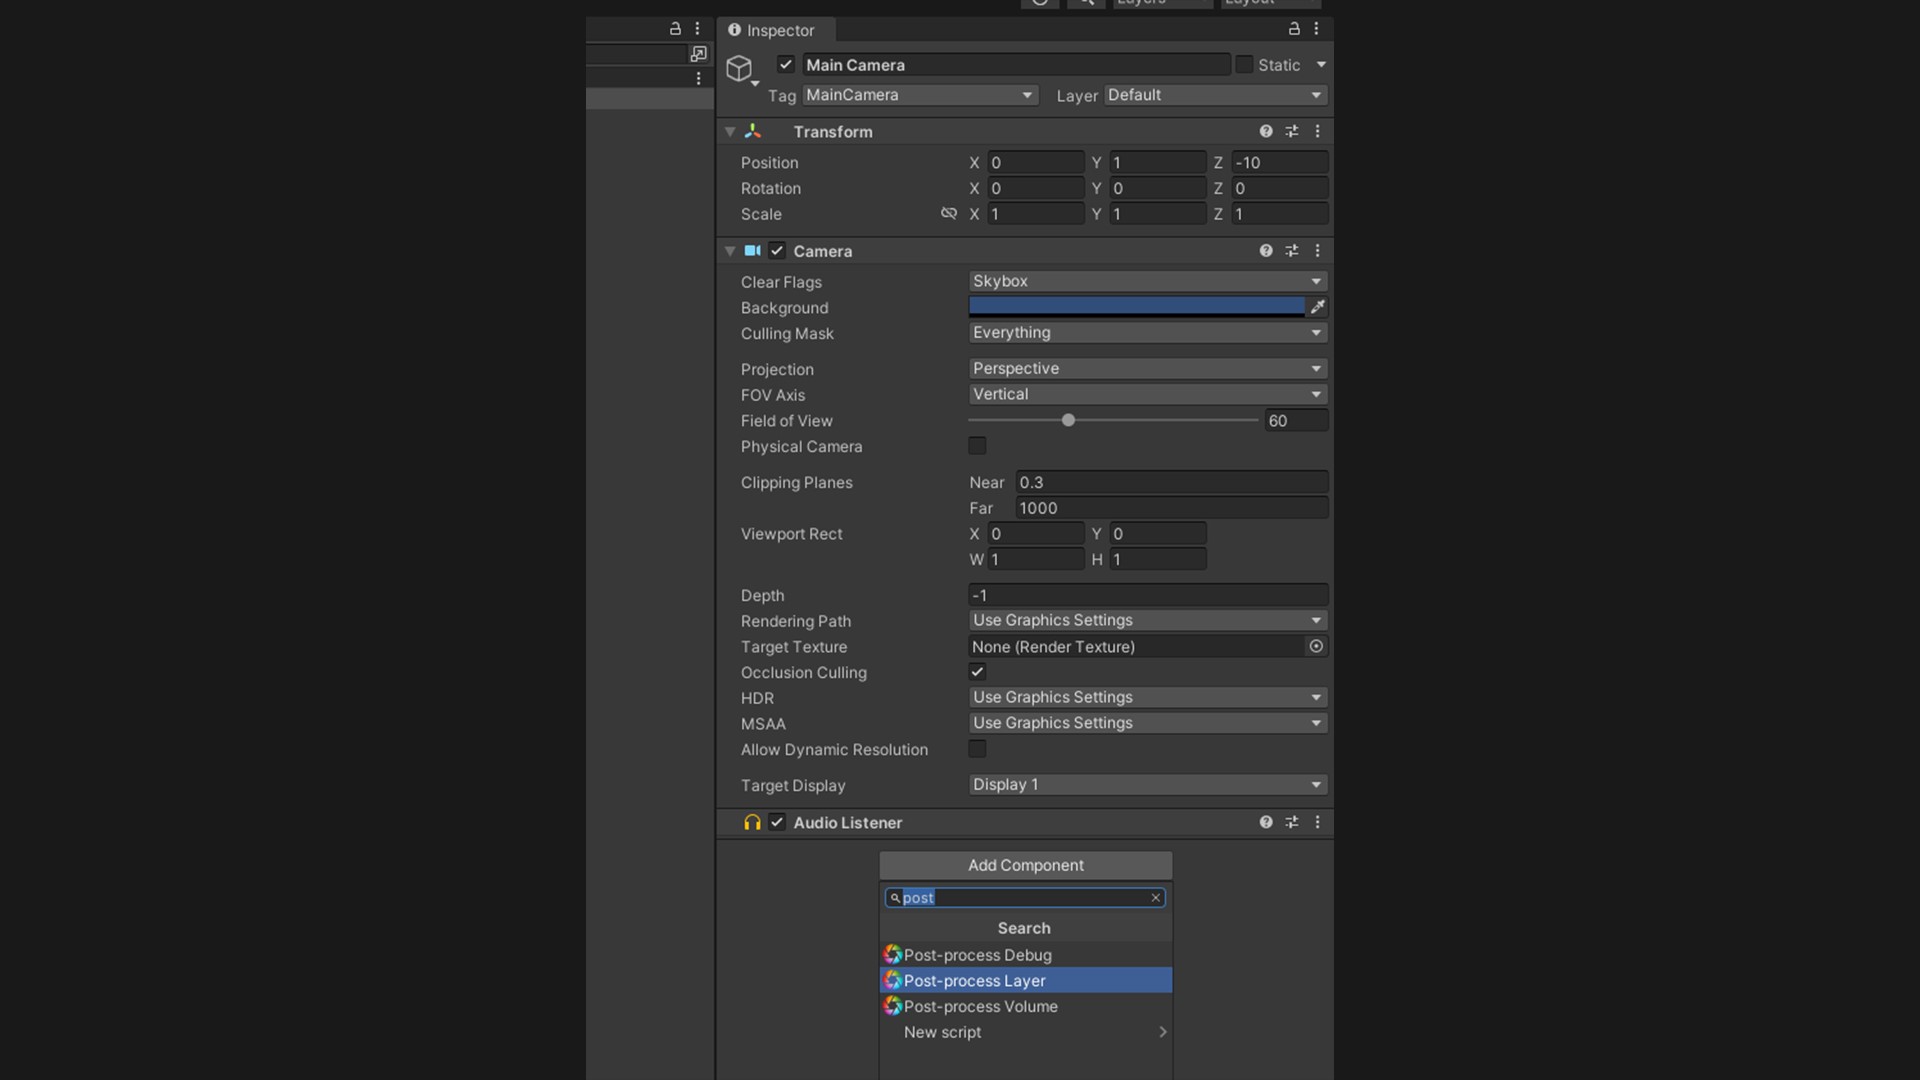
Add the Post-process Layer component by clicking Add Component on the main camera.
Setting Camera and Post-process Layer Components
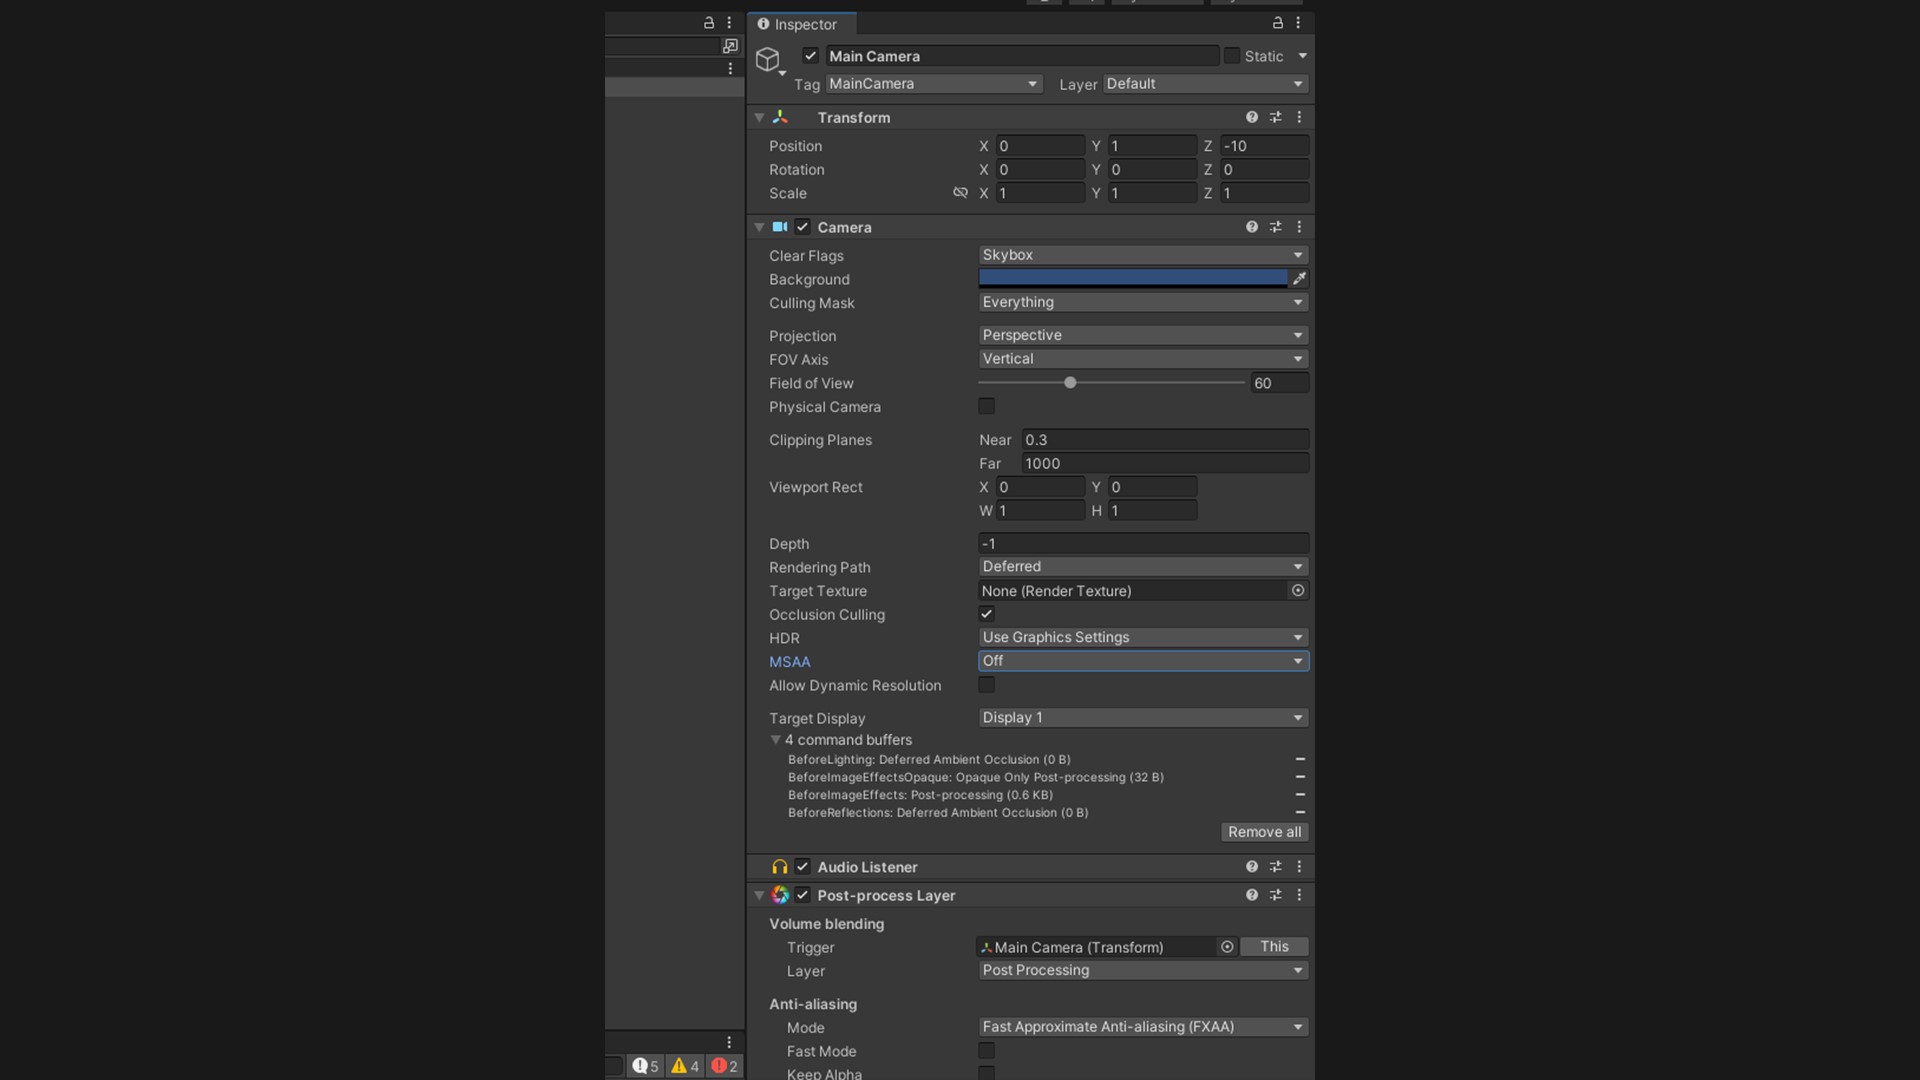
Adjust the settings as follows:
(1) Camera:
– Set Rendering Path to Deferred
– Turn off MSAA
(2) Post-process Layer:
– Set the layer to the one you’ve previously created
– Set Anti-aliasing Mode to FXAA
Creating Post-process Volume
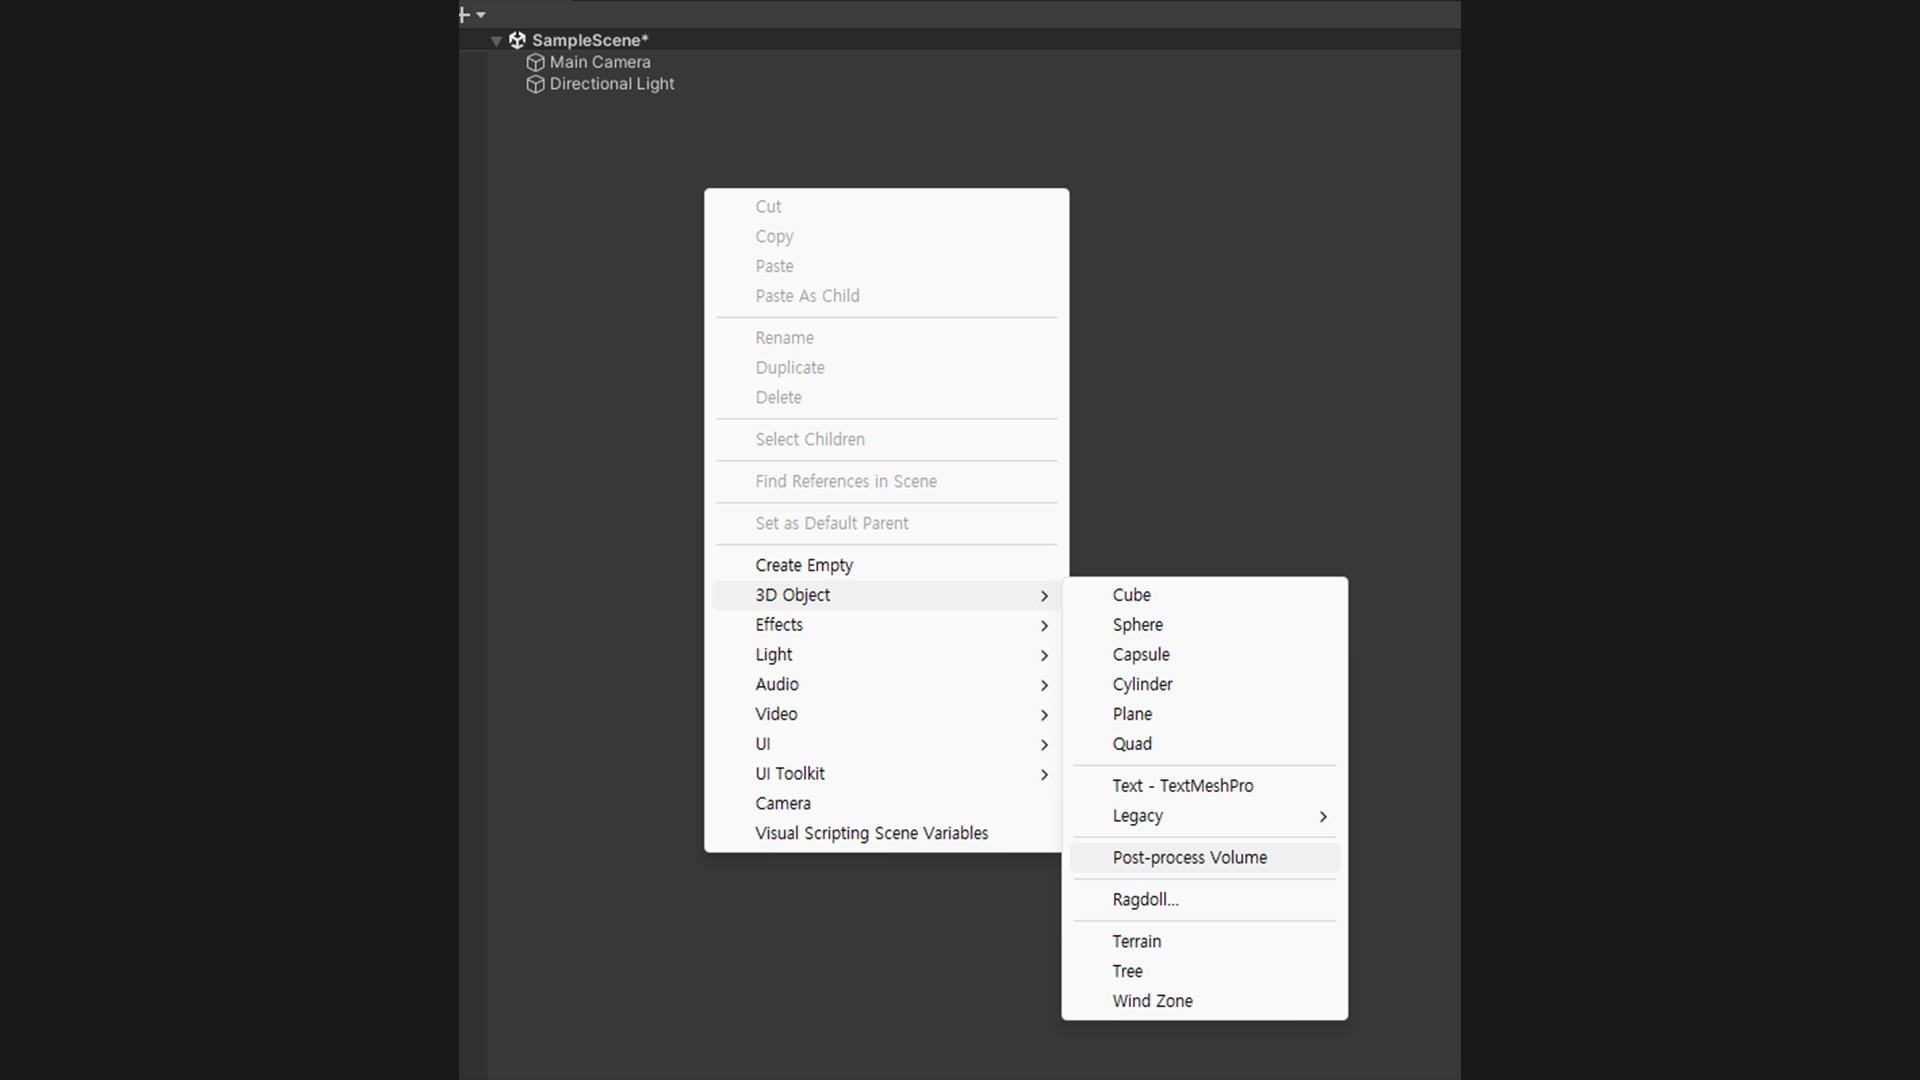
Right-click in the Hierarchy, then click on 3D Object > Post-process Volume to create it.
Setting Post-process Volume
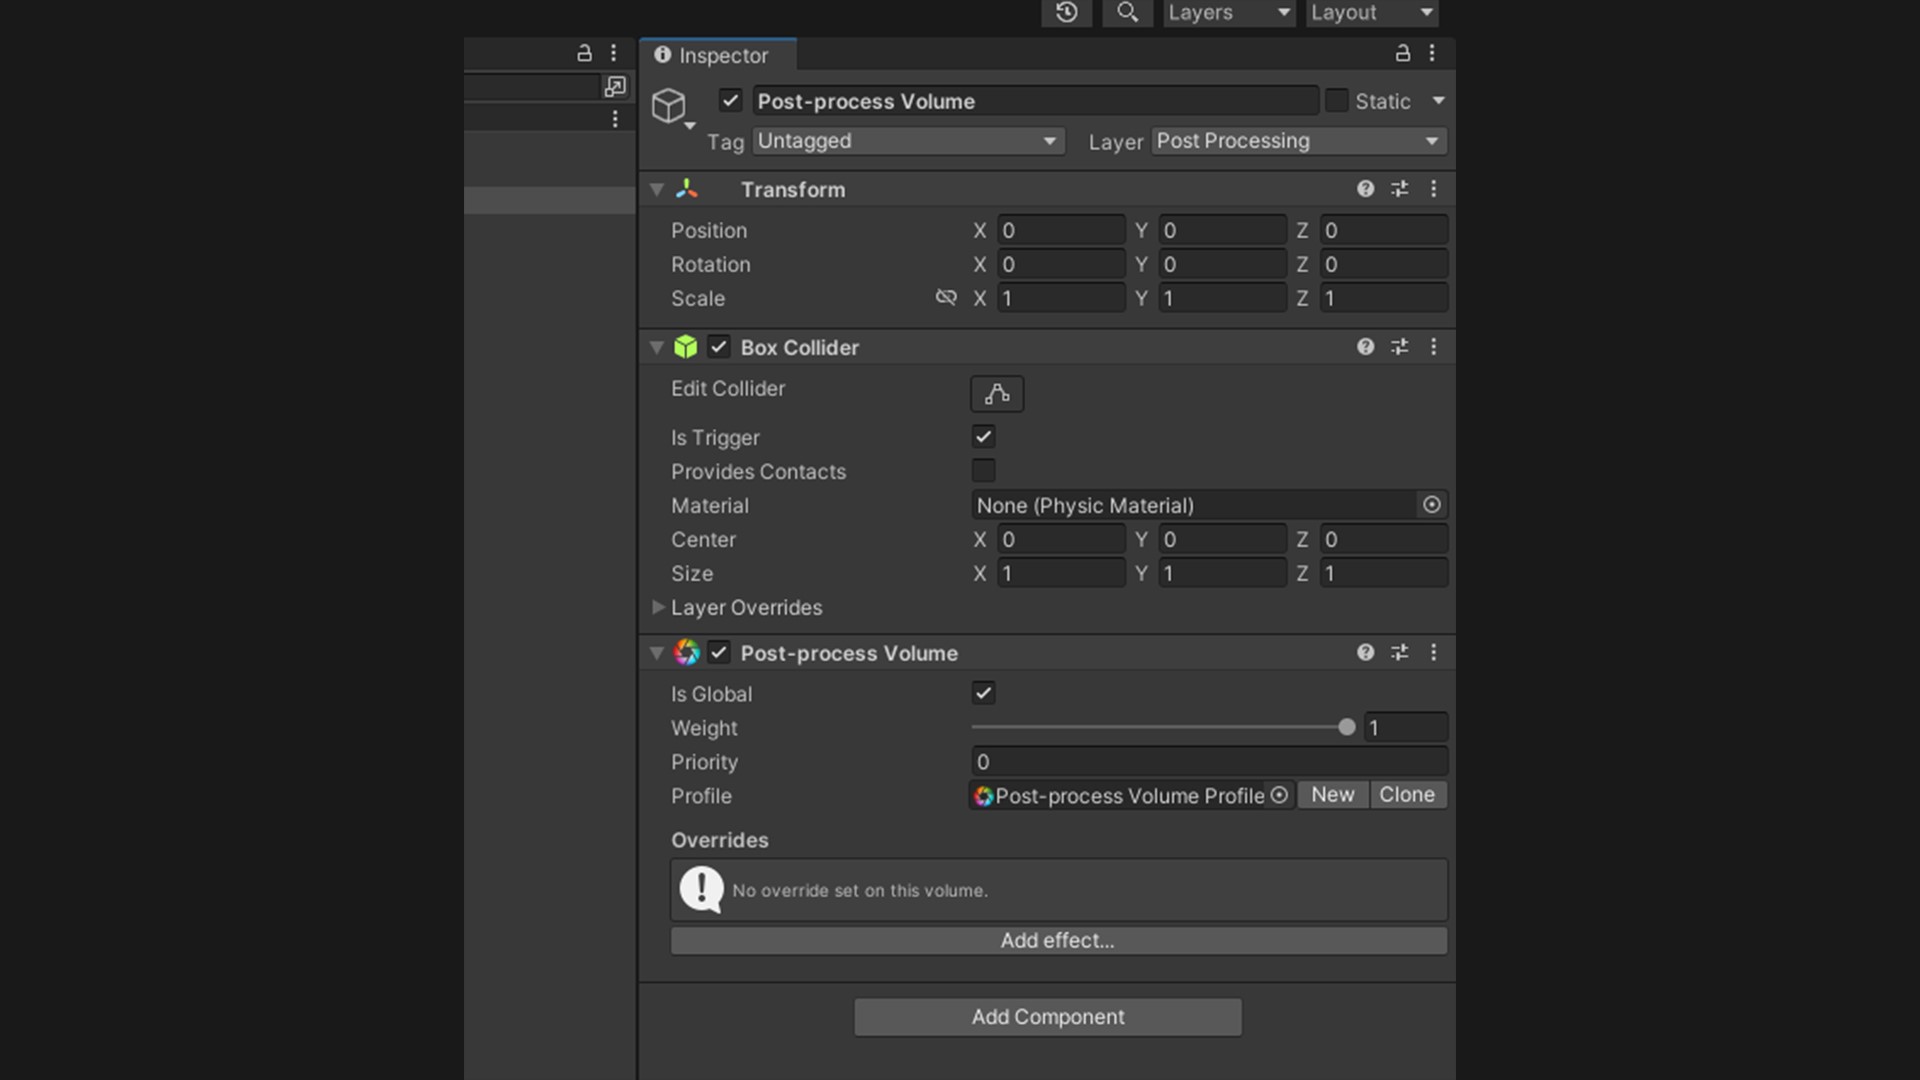
Check “Is Global,” then click the New button next to Profile to create a new volume. Also, set the object’s layer to the one you’ve created.
Adding Effect
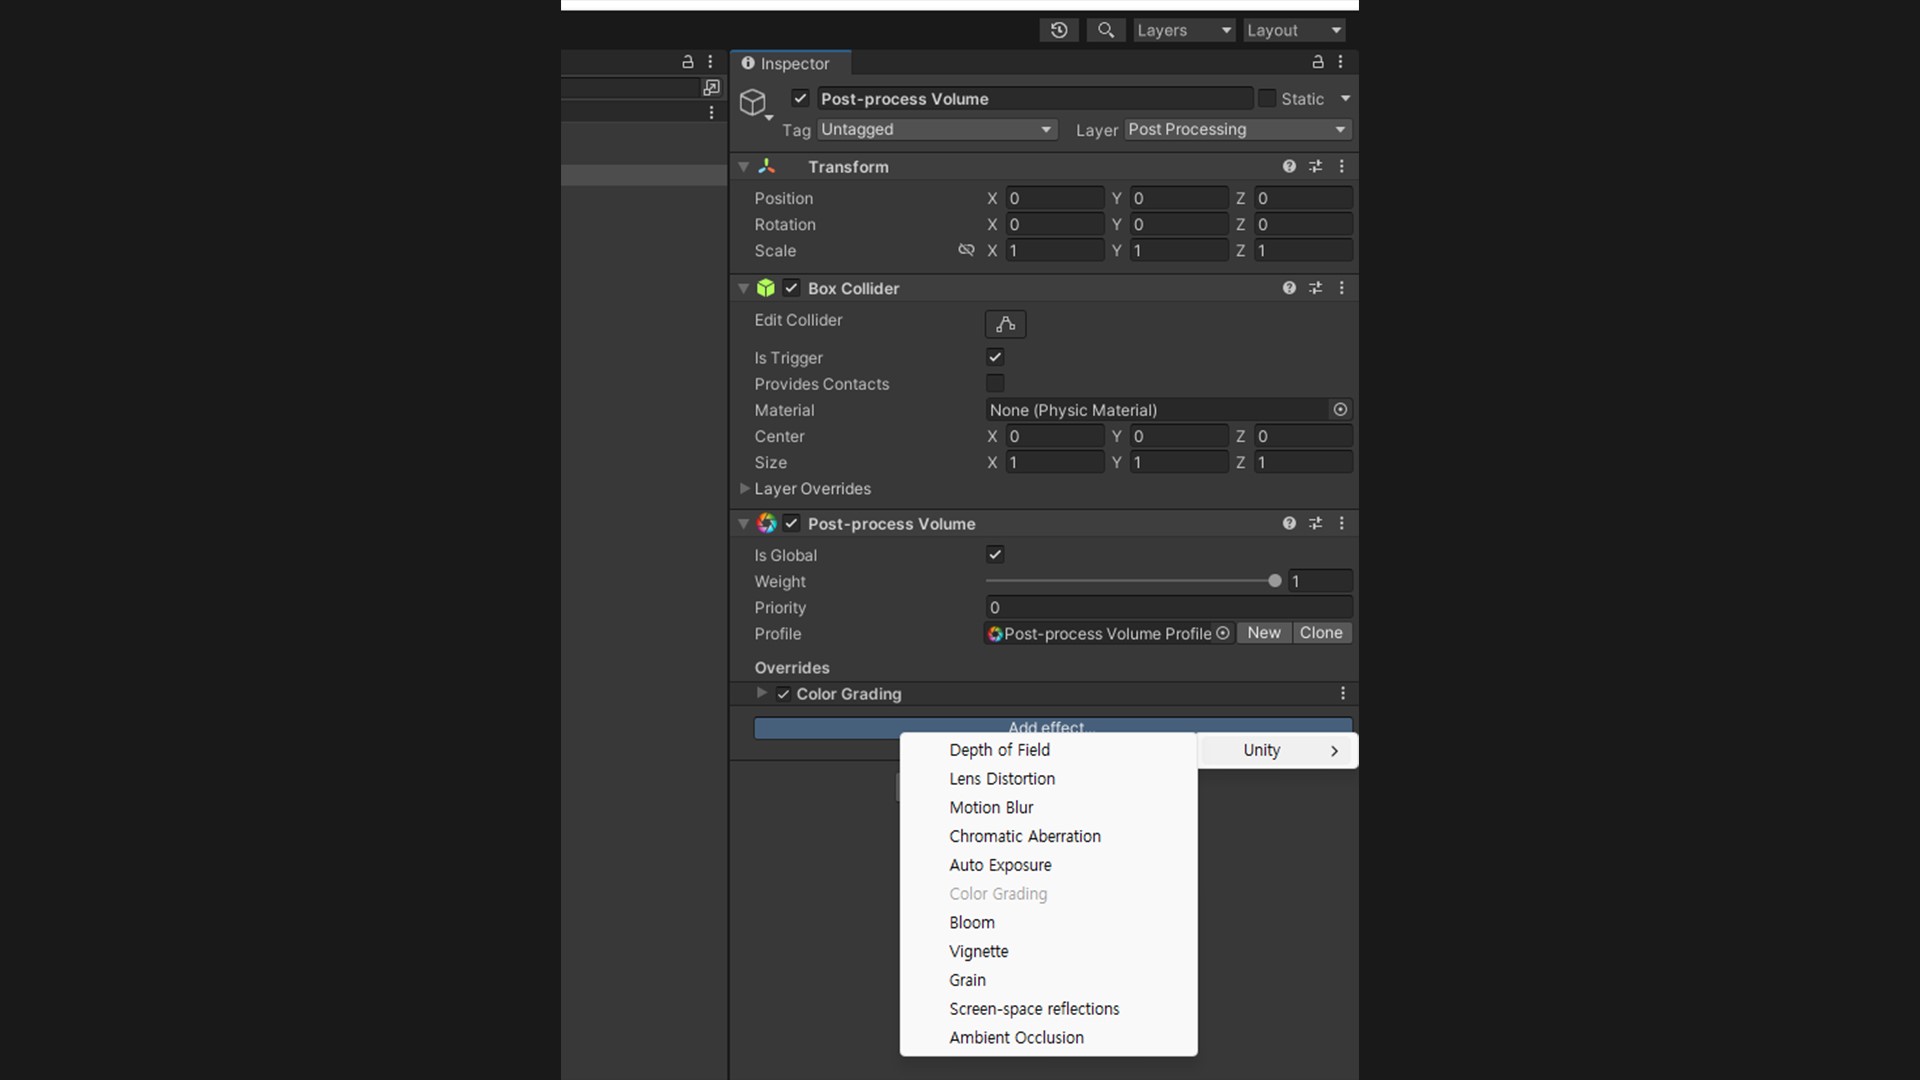
Now, you can add the desired Post-processing effects by clicking Add effect.
By now, you’ve learned how to import the Post-Processing package. Next, we will introduce three magical features that can transform your scenes into cinematic videos, preparing you to apply these features and quickly enhance the quality of your 3D graphics.
First Key Feature: Color Grading – Post-Exposure
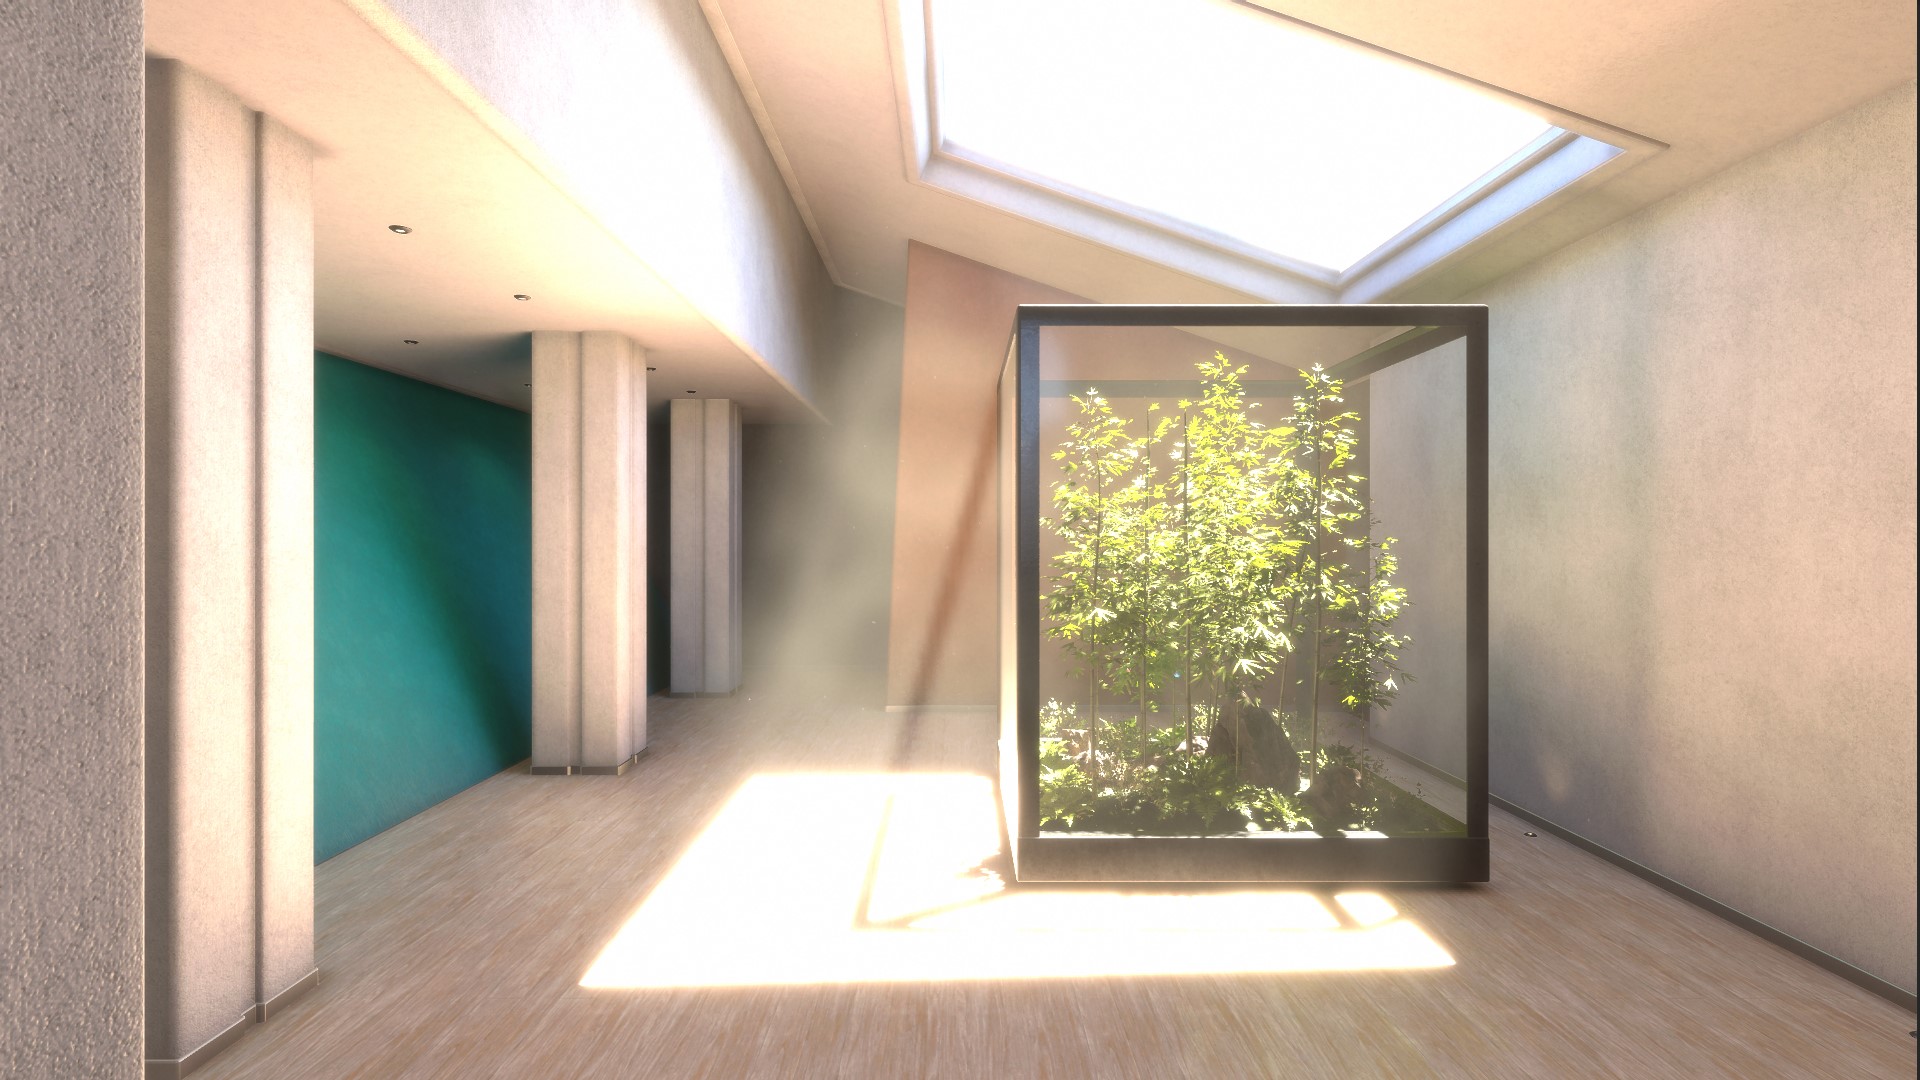
Before and After Adjusting the Exposure

Before
What is Color Grading?
Color Grading is a feature that allows easy adjustment of the overall tone, brightness, and contrast. Adjusting the Post Exposure property lets you control the scene’s overall exposure, ensuring clarity in various environments.
For horror games, intentionally lowering the exposure value can create a tense atmosphere, whereas in scenes where identifying objects is crucial, increasing the exposure can make even dark-textured objects visible, facilitating easier player recognition.
Proper exposure adjustment can also reduce the visual fatigue experienced by players over long gaming sessions. In dark environments, increasing the exposure, and in bright environments, decreasing it can balance the overall light balance of the screen, thereby reducing the visual strain on players.
While Unity’s Auto Exposure effect can be utilized, manually adjusting the exposure value for each environment ensures that the graphic designer’s intent is accurately reflected in the scene.
This can be achieved by applying multiple Post-processing Volumes with the is Global option deactivated, assigning them to different areas to vary the effect throughout the game scene.
However, incorrect exposure adjustments can result in scenes being too dark or too bright, making it essential to find the right balance through trial and error.
Second Key Feature: Bloom
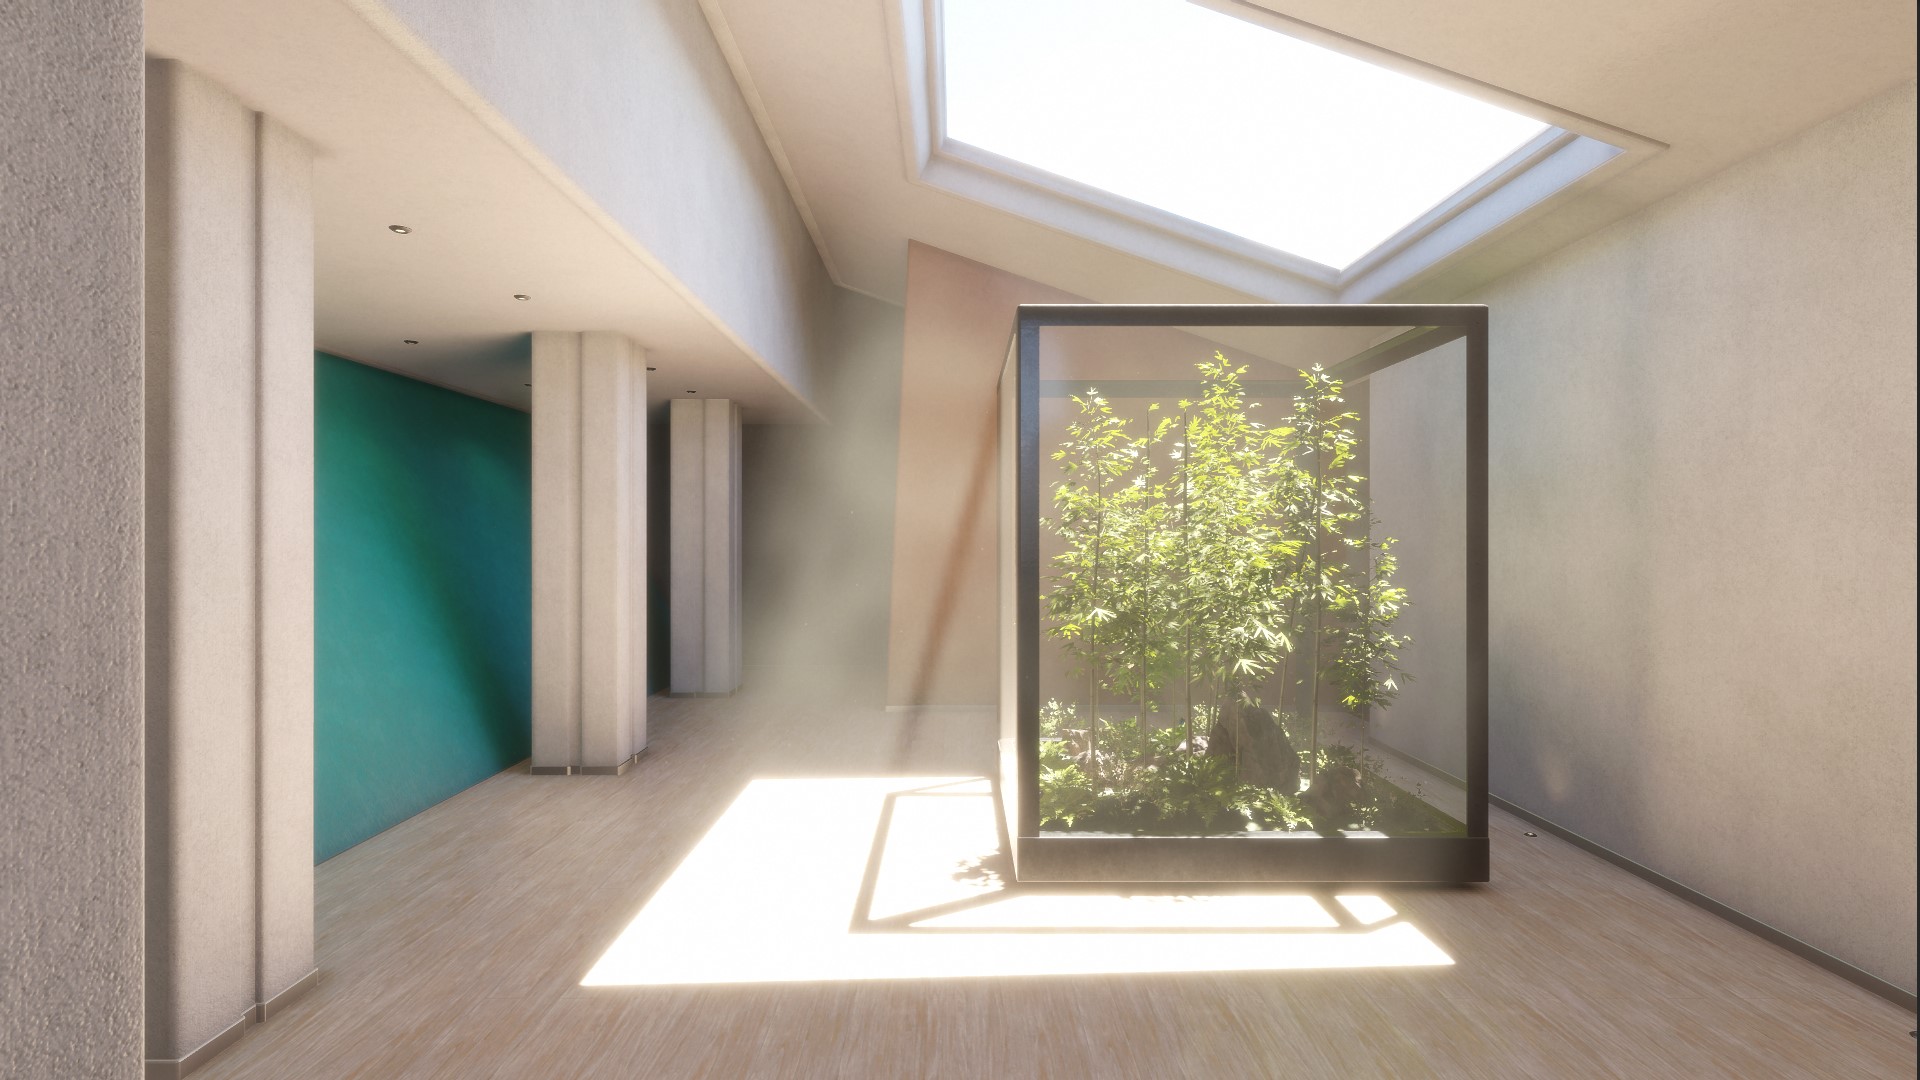
Before and After Applying Bloom
Before

After
The Bloom effect can also be added by selecting Bloom from the Add effect button.
What is Bloom?
Bloom creates a realistic visual effect of light diffusion, simulating the way light spreads from bright areas into darker ones, mimicking the natural light bleed seen by the human eye. This effect can be observed as a gentle dispersion of light on surfaces, accentuating light-emitting objects and creating a striking contrast in darker settings.
Utilizing Bloom can convey a sense of overwhelming brightness, suitable for environments intended to feel warm or for scenes where a dramatic visual impact is desired.
It’s important to moderate the Bloom effect to prevent excessive light diffusion from obstructing visibility. Additionally, since Bloom can significantly affect game performance, removing or reducing this effect in low-spec options may be beneficial for performance optimization.
Third Key Feature: Color Grading – Tone Mapping
Before Tone Mapping
Like with other effects, Tone Mapping can be selected by adding the Color Grading effect from the Add effect button.
What is tone mapping?
Tone Mapping involves reassigning the HDR (High Dynamic Range) values of a scene to fit the display capabilities of standard dynamic range displays, preventing colors outside the displayable range from being clipped or distorted.
Many Unity developers overlook the importance of Tone Mapping, either not setting it or choosing inappropriate options, thereby missing out on graphical details. Without Tone Mapping in HDR settings, colors that exceed the display’s capabilities are lost or distorted, leading to unintended results.
Therefore, it’s crucial to use Tone Mapping in HDR settings to ensure no color information is lost.
When using Tone Mapping, it’s important to select the right mode to preserve texture details in both bright and dark areas of the environment.
Two Primary Mode of Tone Mapping?
– ACES:
A color correction system widely used in the film industry, providing a realistic and cinematic feel. It’s suitable for games aiming for a cinematic experience, offering natural adjustments across various settings.

– Neutral
Adjusts tones without significantly altering the image’s color or contrast, maintaining the original characteristics of the image as much as possible.
While both modes serve to map HDR to LDR, the actual feel of the outcome can differ significantly.
If the game being developed is more casual and not aiming for highly realistic graphics, using ACES might render the graphics slightly darker than intended. In such cases, the Neutral option is preferable.
Have You Mastered Unity 3D’s Post-Processing Know-How?
Post-Processing in Unity allows for easy refinement of graphics without the need for shader work or extensive programming, making it both easy to learn and apply.
Effectively using Post Processing can align the development intent with the environment, influencing players’ emotions and actions, and enabling deeper game immersion while reducing visual fatigue.
If you were previously unfamiliar with Post-Processing, we hope this introduction encourages you to apply it to your projects and explore its full potential.
For those curious about further shortcuts in 3D graphic tasks beyond Unity, or how to quickly produce high-quality images, stay tuned to Elancer, where we match your skills and preferences with the perfect projects, leveraging South Korea’s No.1 IT talent matching platform.
Join the IT Freelancer platform Elancer,
and enjoy our premium services.
Secure your next project with us!